How to take Screenshots in Dragon Age Inquisition
!!!UPDATE 12/19/2020!!!
Unfortunately, HattiWatti’s site is no longer active and as far as I know the Cinematic Tools for DAI cannot be found anywhere else. Should I find a new official link for those I will immediatly correct this post, for the time being this article can be considered outdated.
_________________________________________________________________
Did you ever wonder how to make professional screenshots in your favorite games? There are quite many titles available with epic environments and outstanding details, luckily enough they also might offer you all the freedom you want to take incredible pictures and capture all your favorite moments to live a deeper adventure.
In this article I will talk about one game specifically; keep reading if you would like to know how to take Screenshots in Dragon Age inquisition!
What is Dragon Age?
Dragon Age is a fantasy role-playing video game series created by BioWare. The first game, Dragon Age: Origins, was released in 2009. Dragon Age II, a sequel to Origins, was released in March 2011. Dragon Age: Inquisition was released in November 2014 and judging by the way it ended it may suggest that another installment will probably be developed and released at a later date, although nothing has been officially revealed yet.
The series’ fantasy setting has also been used by a variety of other media, including books and tabletop games.
“Lead them or fall”
9:41 Dragon. The story of Dragon Age: Inquisition follows a player character known as The Inquisitor (One year after the events of Dragon Age II) on a journey to settle the civil unrest in the continent of Thedas and close a mysterious tear in the sky called the “Breach”, which is unleashing dangerous demons upon the world. The Inquisitor is viewed by some as the ‘chosen one’, as they have a ‘Mark’ on their hand capable of closing the Breach. The Inquisitor assembles the titular Inquisition in an attempt to stop Corypheus, an ancient darkspawn, who opened the breach in an attempt to conquer Thedas.
The art of gaming: Screenarchery
What probably many people are not aware of, is that taking a good screenshot is not simply pausing the game and press a key to quickly save what our eyes are seen. Professional screenshots actually require a lot of time, patience and trial-and-error, they are basically like real photography where you need to find the best angles, lighting and compositions.
I personally love sharing my screenshots on Social Media. Doing so I got many questions and comments from different users who couldn’t properly figure out how those images were made in the first place:
“How did you make these screenshots? As far as I know you cannot get those camera perspectives into the game.”
“How can I make screenshots like these?”
“Where did you find these images? They don’t really look like normal screenshots!”
I didn’t use any kind of magic for them. I wish I could say I actually jumped into the game to create a photo shoot directly from there (it would be quite funny, asking my subjects to turn their head to the side for a better angle or to make a pose while they’re busy fighting a dragon), but it’s simply a set of mods and tricks put together.
Let’s start from the very first step now, shall we?
If you want to play around with the camera and alter the original in-game effects you need to download the Cinematic Tools (DEAD LINK!). Everything is updated in order to work with the latest patch released, be sure to read the included text file because you may need to install a new .NET Framework on your computer to make them work.
Once you’re sure everything is perfectly functional you’re ready to proceed and make your first shot.
Load the game and the Tools right after (both with administrator rights), you should get a console window with the green text ‘GUI found‘.
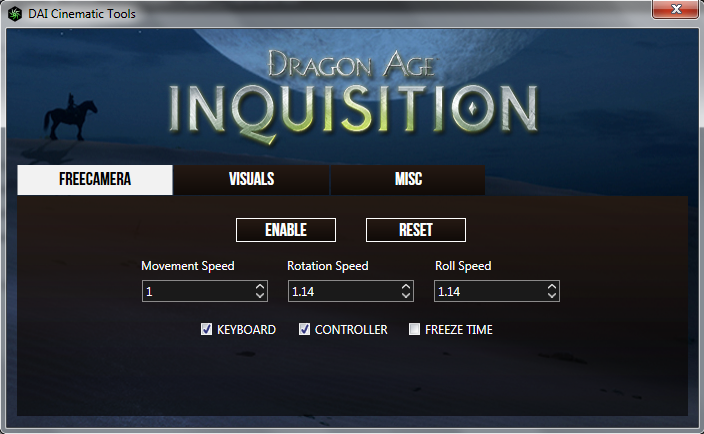
Freecamera: Just like the name suggests, this panel will allow you to activate the so-called ‘Flycam‘. Pressing the Enable button you will immediately notice a change in your point of view. Moving the directional arrows from your keyboard you can rotate the camera and find completely new angles, if you have a numpad (which is absolutely required for our purpose here) you can also move on the left with 4, on the right with 6, up with 9, down with 7, forward with 8 and backwards with 2. With 1 and 3 you can literally tilt the whole scene. Page Up/Down automatically changes the FOV (Field of view) distance.
If you have a controller and prefer to use that one instead, you can find the needed instructions into the Readme file:
- Left thumb to move
- Right thumb to rotate
- Left and right trigger to move up/down
- Shoulder buttons to roll
- Press left and right thumb to change the FOV
You can alter the rotation and movement speed of your camera and freeze the time during cutscenes.
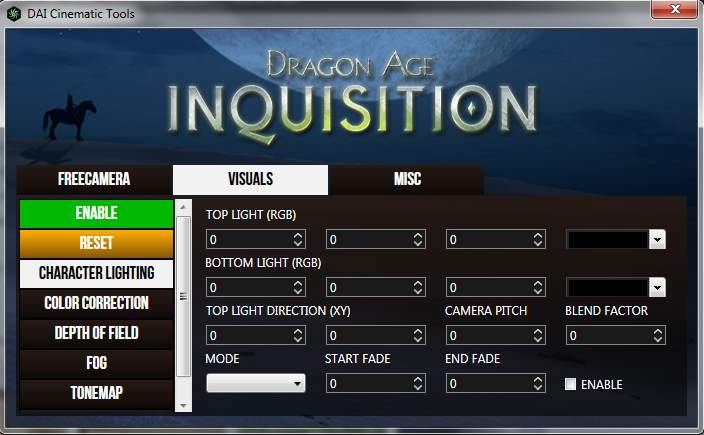
The second tab is very important because it allows you to modify or add effects that you wouldn’t normally get. You can activate the options pressing the Enable button and navigate through the available slots to make tests and see what happens if you change the default values.
Character Lighting: I actually rarely use this one, but it basically makes the characters darker or lighter according to your needs.
Color Correction: A bit tricky, but I suggest you to try it out. It will change the overall scene color creating different kind of atmospheres!
Depth of Field: My personal favorite. Just like with real photography you can focus only on a single object/character and give a moderate or strong blur to everything else.
Fog: I simply love playing around with it! You can transform a bright, sunny scene into a dark, gloomy area (or vice versa).
Tonemap: Another color variation. You can combine it with the Color Correction to get stronger or mixed tones.
Vignette: It makes the vignette stronger or removes it completely. I always keep the standard values because it gives a cool cinematic look to my shots.
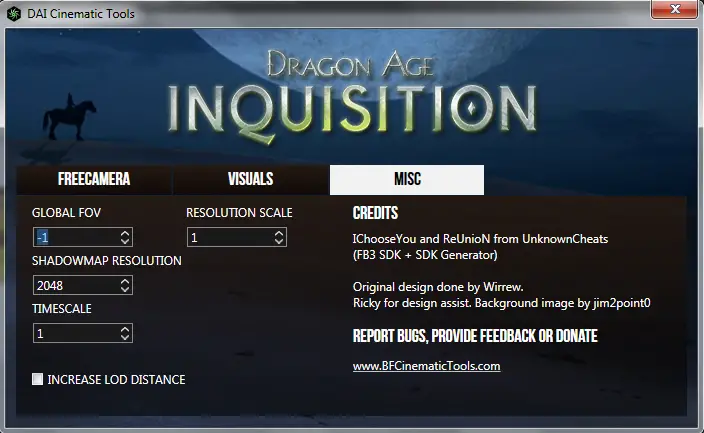
Third tab, recommended for better details.
Global FOV: It changes the distance between the camera and a character/object, creating better angles if you plan to make a closeup. If you don’t increase the FOV certain subjects might appear a bit deformed/stretched from a specific distance and you can’t properly zoom in. The best options (in my opinion) for a good FOV are 5/10/20 for characters closeups/portraits and 60 for big scenes, but it’s up to you and your preferences.
Resolution Scale: Very useful if you want to increase the detail and quality in your image, BUT be careful! If you increase it too much your game could crash due to the exceeded limit of your GPU (Graphics Processing Unit). I usually do not go beyond 2, which is definitely good anyway and gives you a huge improvement.
Shadowmap Resolution: This technically reduces or increases the overall shadows a little bit. Not necessary, but in case you don’t want to overload the game with effects and such you can type a lower value (maybe around 540).
Timescale: It alters the in-game time. Setting the value to 0 it simply freezes everything like the standard pause, but if you set it on 2 or 3 it will accelerate the flowing (useful for funny videos :P).
Increase LOD distance: This gives you better details on distant objects.
Hotkeys
Activate/Deactivate free camera – Insert
Freeze Time – Home
Hide HUD – Delete
Common issues and solutions
• If you activate the free camera once again and the whole point of view is stuck into your previous location: Click on the Reset button in the main tab (sometimes you may need to do so two/three times to properly fix it)
• If you use the fast travel to change area and the DOF doesn’t seem to work anymore: that happens because for some reason the original values are suddenly too high. Just bring them back to their initial state or lower every setting until you find the combination you need.
• If you accidentally press the Page up/down key and can’t reset the FOV: Go to the third panel and modify the related value. If it’s already on -1 (default) simply type a random number and then put it back to -1 again.
• If you can’t unpause the game: Be sure the Freeze Time option is unchecked. If everything stays frozen even without the common pause (through CTRL) you probably have it active. If the option is not checked try to check it and deactivate it right after, this should solve your problem.
Common bugs
These tools are quite good and rarely give me issues. The only problem I encountered in the past (mostly with older versions) is that at some point the game closed on its own without error messages. I’m not exactly sure what might cause that, but with the latest version it seems pretty much solved (for now).
Another minor glitch (which I don’t consider a problem because I LOVE it!) is the sudden change of atmosphere. Your ambient might stay stuck on nighttime or give you a sort of fake dawn.
Don’t worry though, it will be back to normal once you reload your save 😉
Now the most important question: how do you actually make and save these screenshots once you’ve found a composition you like?
You could use a capturing program like Fraps to automatically store every screenshot just pressing a specific key, but if you have installed a ReShade configuration into your game folder then you only need to use the common prtsc (printscreen) and your images will be saved there.
Needless to say that I believe you should definitely try some good Visual settings as well in case your game is still ‘vanilla’. You can find the best ones on this Nexus page, simply follow the author’s instructions and enjoy your new experience!
Last but not least, if you want to know how to make bigger pictures even if you cannot play in 4k (ultra HD), I might have a good solution for you.
There are a few interesting tools that can alter your original resolution making everything way bigger. One of these programs (and probably the only one you can currently use with DA:I) is the Windowed Borderless Gaming.
How does it work?
You don’t even need to install it, simply launch the application once your download is complete and wait until a new icon appears at the bottom. Right-click on it and select Add Window (F3). Go back to your game (assuming it was already loading) and press the F3 key until a confirmation message appears, then right-click again and go to Settings > Game Settings.
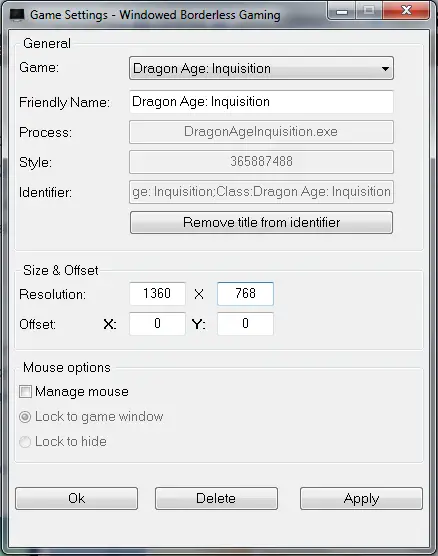
You should now see the game listed in the window along with your native resolution. I have two screens, but as you can see the size is not particularly big. If I want to share my images on external sites like Flickr I have to be sure they are big enough to display all the quality and details I want to put into them.
There’s no way to manually change the resolution from the game options, so that’s when the WBG comes in handy without forcing you to add custom sizes in your Nvidia panel (it would be limited anyway, it highly depends on how many resolutions your monitor supports). If you type a custom size next to Resolution and click on Apply (you may need to do it twice to stabilize the alteration) your window will finally change according to the new values.
If you want to reset it and play normally just write your native resolution and apply again.
Be sure your game is already running in windowed mode.
Warning: You can technically change the resolution as much as you want, but your video card will definitely struggle and if it is too much your whole system might reboot itself. I think it also depends on your original resolution and how much the GPU has to recalculate.
If you are considering to get this game you should check the minimum and recommended requirements first to be sure your computer will be able to run it:
Minimum requirements
CPU: AMD quad core CPU @ 2.5 GHz, Intel quad core CPU @ 2.0 GHz
RAM: 4 GB
OS: Windows 7 or 8.1 64-bit
Video Card: 512 MB, AMD Radeon HD 4870, NVIDIA GeForce 8800 GT
Free Disk Space: 26 GB
Recommended requirements
CPU: AMD six core CPU @ 3.2 GHz, Intel quad core CPU @ 3.0 GHz
RAM: 8 GB
OS: Windows 7 or 8.1 64-bit
Video Card: 2 GB, AMD Radeon HD 7870 or R9 270, NVIDIA GeForce GTX 660
Free Disk Space: 26 GB
If you plan to take HQ screenshots in Dragon Age: Inquisition you definitely need to meet the recommended requirements.
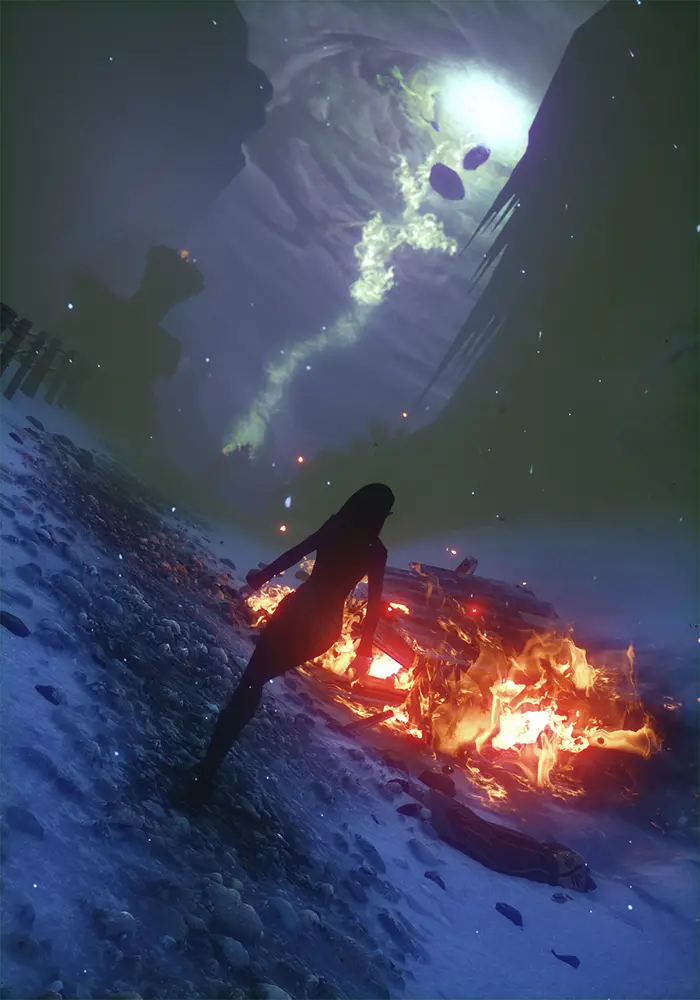
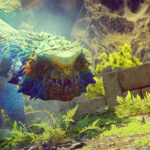
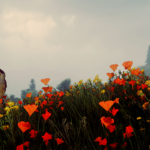
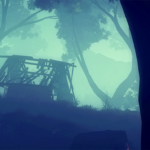
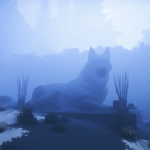
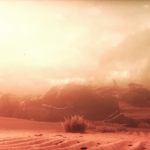
With that said, if you are into fantasy RPGs and never tried this series you could definitely give it a shot! I mean, just look at the wonderful locations you can explore and the immersive world it offers.
If you’re interested you can find the PC version of the games on these pages:
Dragon Age: Origins
Dragon Age II
Dragon Age: Inquisition (Game Of The Year edition with packs and DLCs included)
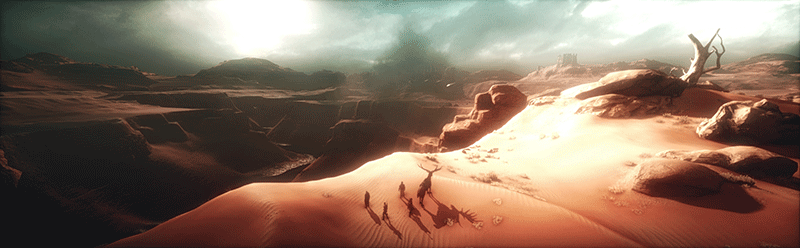
I also attached some more shots for you to give you a clear example of what you can do with the Cinematic Tools 😀

8 Comments
Opolcsik Ivett
Hey! I tried to run it, but i gives me Last error 0x2 🙁 Dunno why it’s not working, did everything as it was written.. I’m desperate, could you please help me? Q_Q
Nika
Hi Opolcsik!
I’m sorry to hear the tools are giving you such a hard time 🙁 is this error appearing as soon as you try to open the tools?
1) Try to set both Origin and the game with admin rights if you haven’t already
2) Also open the tools with admin rights
What happens after this? Do you get the error straight away?
Also, I recently updated the link for the tools. I suppose you just downloaded them, but in case you got them before that and never had the chance to try this out until now, check the new link!
If none of these are fixing the problem for you, you can try to use the Injector instead http://www.extreme-injector.com/
A lot of programmers use it for their custom made flycam mods, if your antivirus detects it as potential threat don’t worry because it’s completely safe.
Open it (as admin again), click on the Select button to locate the DAI executable, then under Add DLL search for the cinematic tools path and load the DLL from that folder. Then click on Inject. I found this recently on Reddit, if it works I will update the guide.
Let me know how it goes!
Opolcsik Ivett
Hey!
Thank you for the tips, but i tried it all. I tried to run it as admin everytime , even with Frosty, and without it, but as soon as i run Flycam and click into the game, it drops out this : https://imgur.com/2rV18LH
I waited after it, but nothing happened, and when i closed the Flycam tool’s tab, it also closed my game immediatly :S
I tried with Injector, but the program doesn’t find my game exe even tho i was running it after i started the game.
https://imgur.com/t7eO2IZ You can see the game is running but the Injector doesn’t see it. I can’t even select a new exe, so yeah. I don’t know what i do wrong…
I don’t think i downloaded an older version of Flycam, since i donwloaded it yesterday :’D
I also deleted all of my Microsoft Visual C-s, and then only put back the 2015 one, and also installed Microsoft .NET Framework 4.5.. So yeah im kinda stucked for real.. I read many forums, but everybody got their Flycam work after reinstalling their Visual C :S
Nika
Damn this is really annoying, isn’t it? I know for sure that .NET Framework related programs can cause troubles more often than not. My Win7 updated automatically last year and for some reason it screwed up a lot of things for my .NET stuff. Couldn’t run some flycam mods anymore either.
With that said, let’s see if we can locale the root of the problem, or at least make the Injector work. I tried out the Injector from the Reddit link I found and realized it is completely different from the standard Injector that I used with other games, so maybe you can try that one too https://www.dropbox.com/s/jlmjxkbc3oy9cf5/Injector%203.7.zip?dl=0
Your antivirus, once again, may detect it as virus. Just exclude it and it should load fine with admin rights. With the game running in the background see if you can locate the exe this time and successfully inject the tools! Again, keep me informed about the outcome, I’ll try to help as much as I can!
Opolcsik Ivett
Sadly the dropbox link is already expired – it’s says the file isn’t there already 🙁 Could you please find me an other link or something else? I’m sorry for bothering you this much , it’s really annoy me that i can’t make it run that program -_-
Nika
Oh damn seems like something went wrong when I pasted it, sorry about that! Here, try this one https://www.dropbox.com/s/jlmjxkbc3oy9cf5/Injector%203.7.zip?dl=0
I think the Settings.xml file isn’t really needed since it should be generated automatically as soon as you load the Injector.
And you aren’t bothering at all! I actually feel bad about this because I know how irritating this whole tech stuff can be and DA:I is really a gorgeous game, it totally deserves to be experienced in many different ways. I’ll do the best I can to help you fix this!
Opolcsik Ivett
Hey!
Sorry for the late reply, i had busy days…
I successfully downloaded and used Injector, but the Flycam still refuse to cooperate with me even with the Injectors help … -_- https://imgur.com/a/Tym3EYd
Nika
Mhh okay, this is so odd.
I wonder though, what happens if you ignore that message and try to use the camera following the shortcuts? I just saw someone reporting on Reddit that they still have the error via Injector, but the camera works fine.
I guess, however, that you’re not seeing the console with all the other cinematic settings… is that so?
I’m going to research this a bit more in the meantime!
EDIT: You said you already set Origin with admin rights too, yes? I found a forum thread related to this same issue and someone posted an older version of the tools https://www.dropbox.com/s/g679q7s9h9gzzxg/DAI_Cinematic_Tools_120815-cc4862.rar?dl=0
See if this helps somehow. Might be too old for you, but everything’s worth a shot at this point.
EDIT 2: Are you running the game in full screen mode? If so try setting it on windowed.