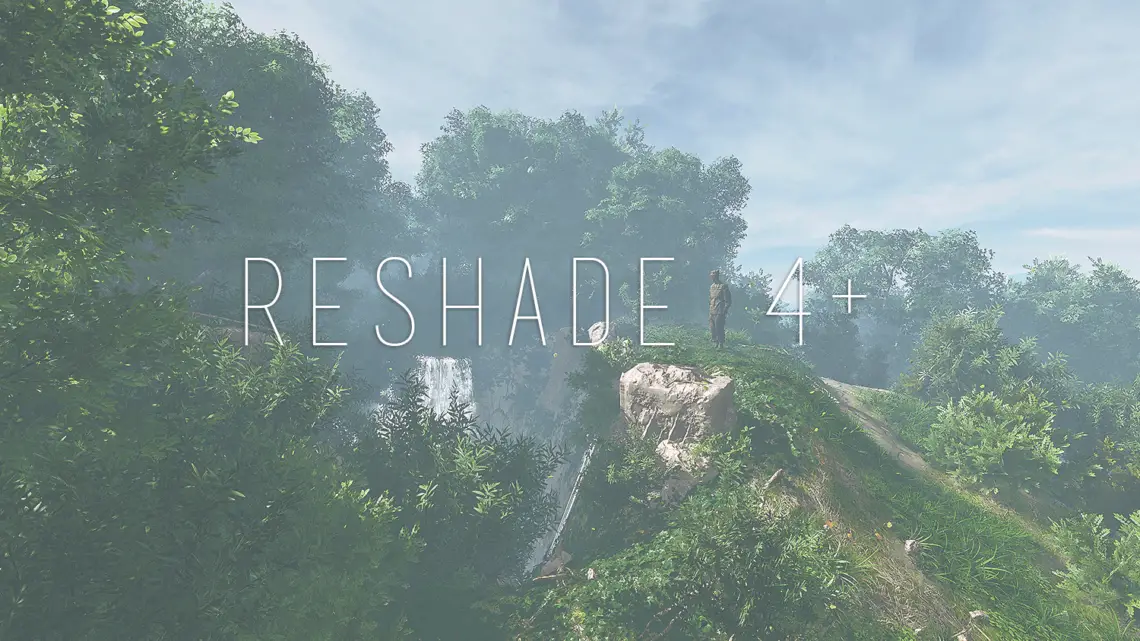
ReShade 4 Real-time Post-Processing
Considering how outdated my previous guide for ReShade 3 is nowadays, it is time for me to finally make a new post and create an updated overview for the latest version of ReShade and its post-processing configuration.
Also, Happy New Year!
ReShade is a graphic mod created by crosire and used by many gamers and digital artists to combine different filters and special effects in their games, creating oustanding artworks that look like irl professional photos or illustrations. ReShade 4.5.2 can be downloaded from the official site and installed following these quick steps (pretty much the same as ReShade 3):
- Launch the ReShade executable
- Locate the game’s exe and set the correct API (the new version should detect the correct one automatically though)
- Let it download the library of effects and select the ones you want (or get them all to test)
- Let it finish and close the installation, then load the game to see if ReShade is working as intended
- Open the console with the updated shortcut, which should now be the Home (“Pos 1” on some keyboards) button
- Start building your custom preset(s) testing out the effects in real-time
If you see a message on top about the ReShade version and launch key, it means the installation worked as intended and you can start using it. If your game of choice crashes as soon as the message appears or even on launch, you may want to try uninstalling ReShade and give it another shot by loading it with administrator rights as well as the game. If the title loads fine, but you don’t see any ReShade notification on top, it means it isn’t compatible with the version of ReShade you picked or you didn’t install it correctly. Sometimes a game may have two different executables (32bit or 64bit) and in that case you have to be sure ReShade is targeting the correct one. Unreal Engine 4 games are especially known to have this variation and in most cases you may need to install ReShade on both executables regardless of the needed one.
Unfortunately, some older games just cannot seem to work with any version of ReShade at all. In that case you may want to try SweetFX instead, or download a few older versions from the Repository.
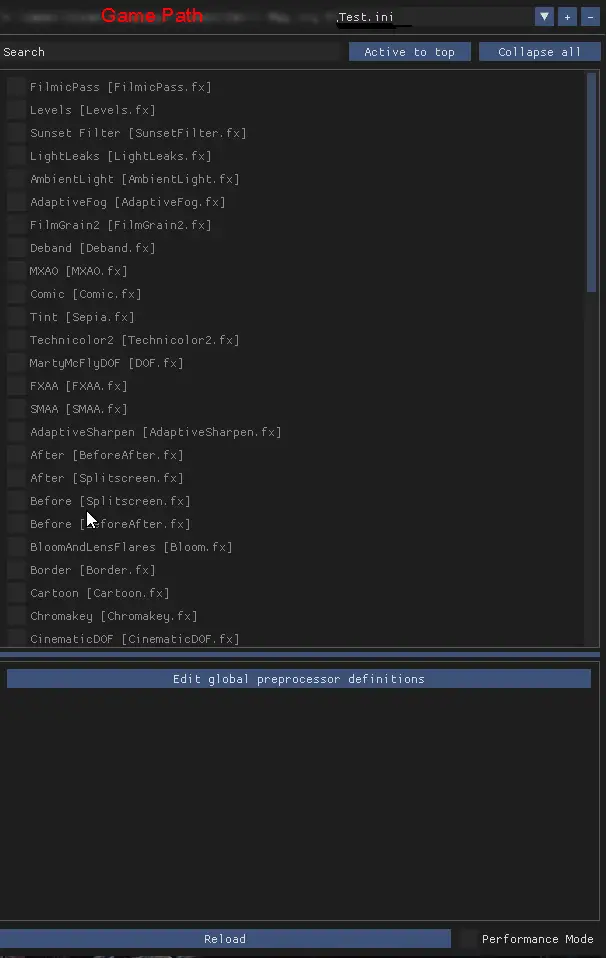
Once you open the console with the designated key, a small tutorial will guide you through your first setup. With the little + on top you can make a new profile and name it however you like, the list of installed shaders should appear underneath. If it doesn’t, it means you either skipped the download process when ReShade installed, or something went wrong with it. If you already have the reshade-shaders folder included in your game’s directory with all the .fx files, then you should consider to re-install it.
By default all shaders are turned off. You can select them one by one to see how they affect the scene and what you like most. Each filter can be altered with its settings that will appear under Edit global processor definitions.
If you want to use even more advanced shaders, you can overwrite the downloaded ones with these.
Filters
While gaming is becoming more and more realistic nowadays with also the Raytracing feature implemented on the most recent RTX cards, with ReShade you can reach an even higher level. If you love virtual photography and generally spend a good amount of time shooting characters or environments, you won’t be satisfied until your composition looks as visually pleasing as you want it to be.
With ReShade’s presets you can generate different profiles depending on your needs. Here’s a complete list of the most useful default filters included with the installer, along with some nice custom made effects that you can add to your game manually.
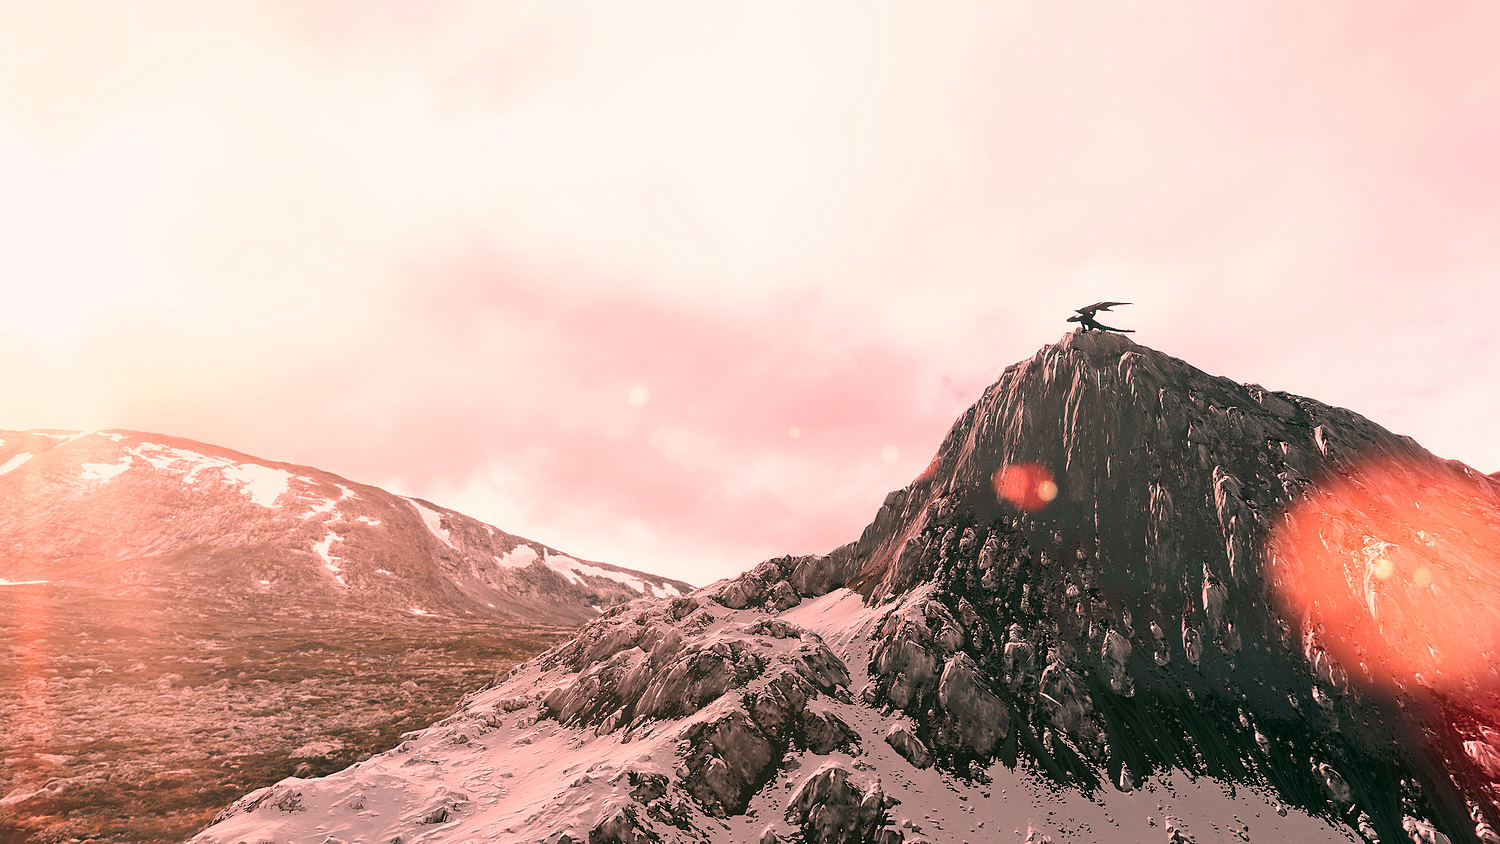
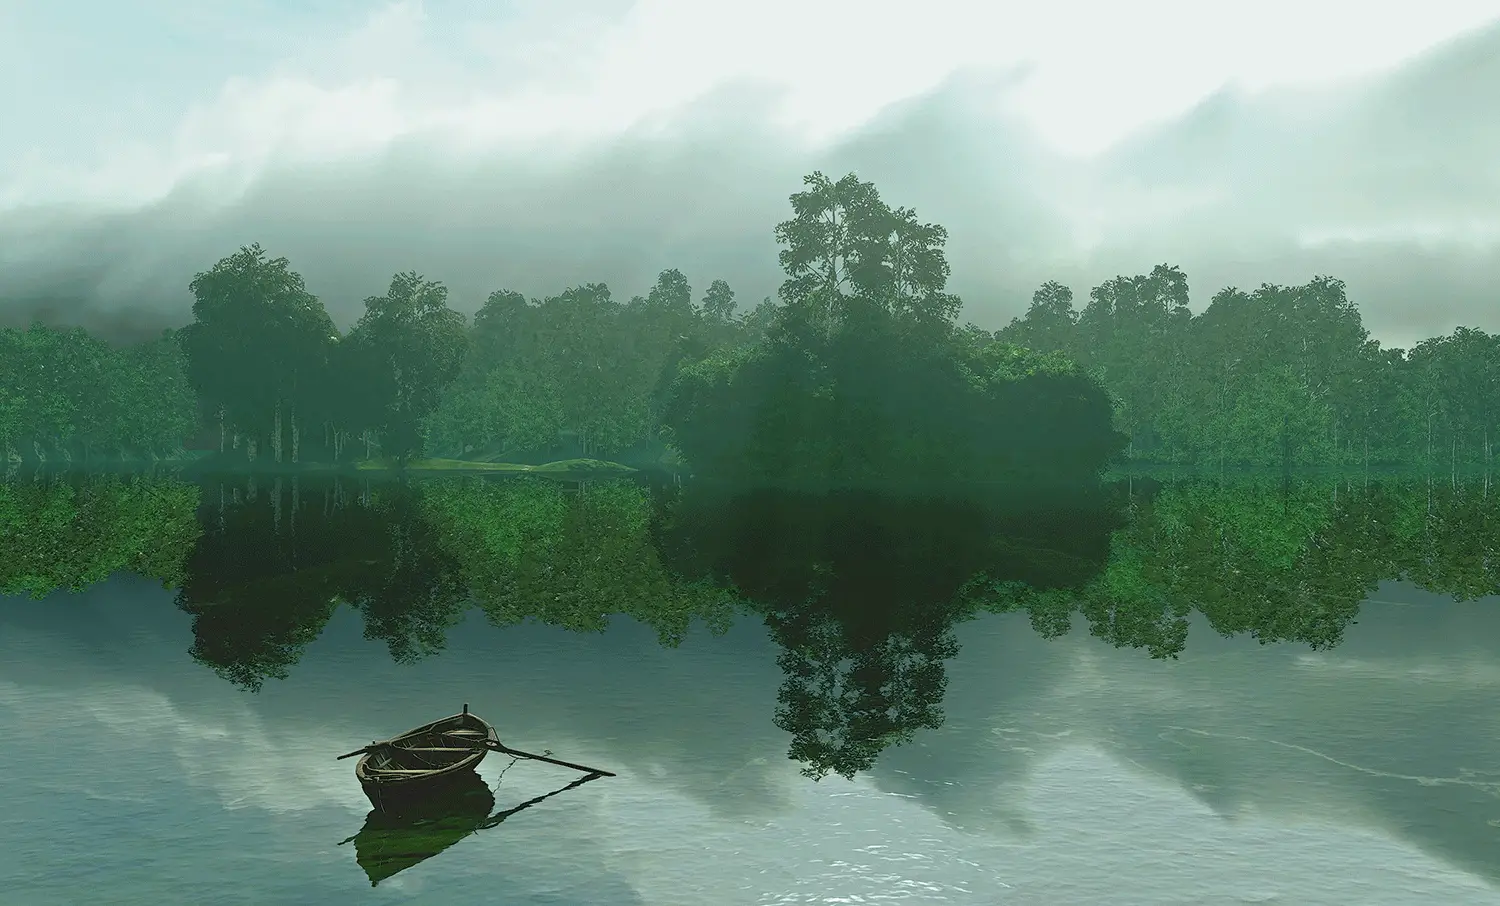
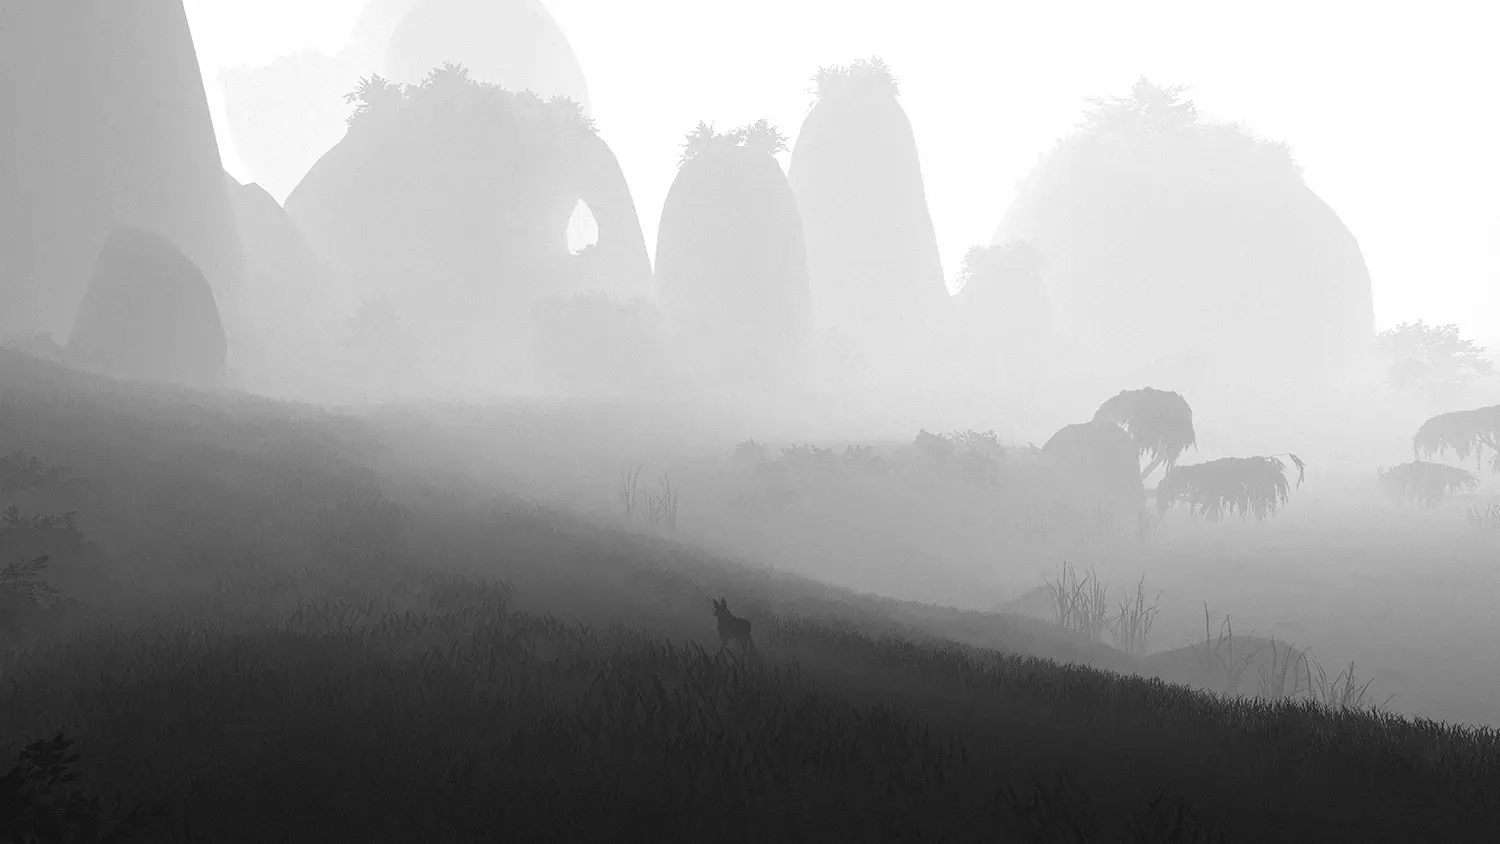
1. Adaptive Fog
This shader is very nice-looking if you want to create misty and dark scenes with volumetric lighting. It doesn’t always work though as the game may not be configured with depth buffer, needed to also work with cinematic Depth of Field and z-depth pass.
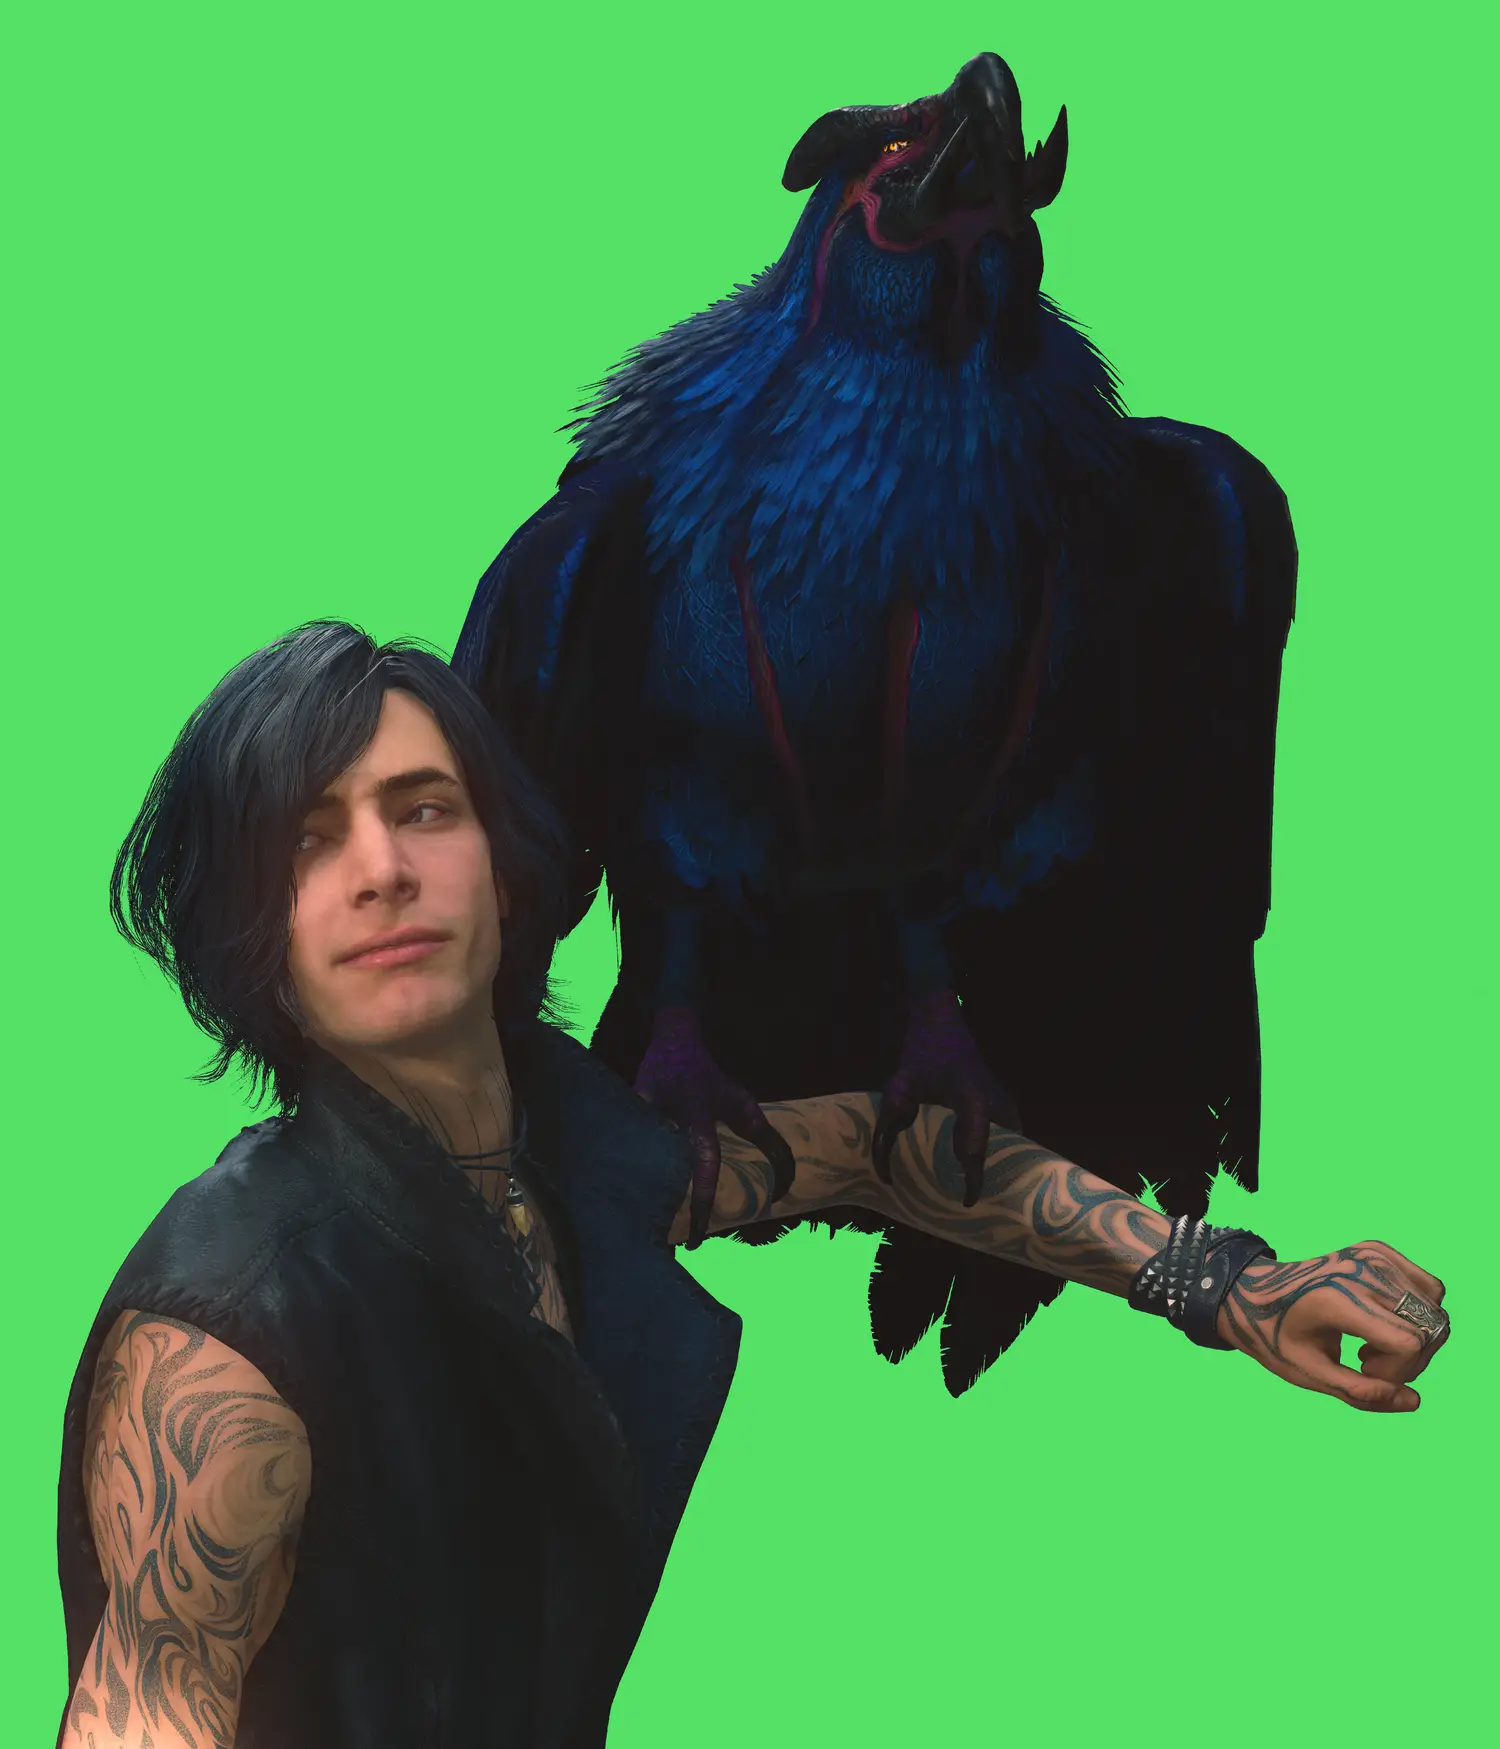
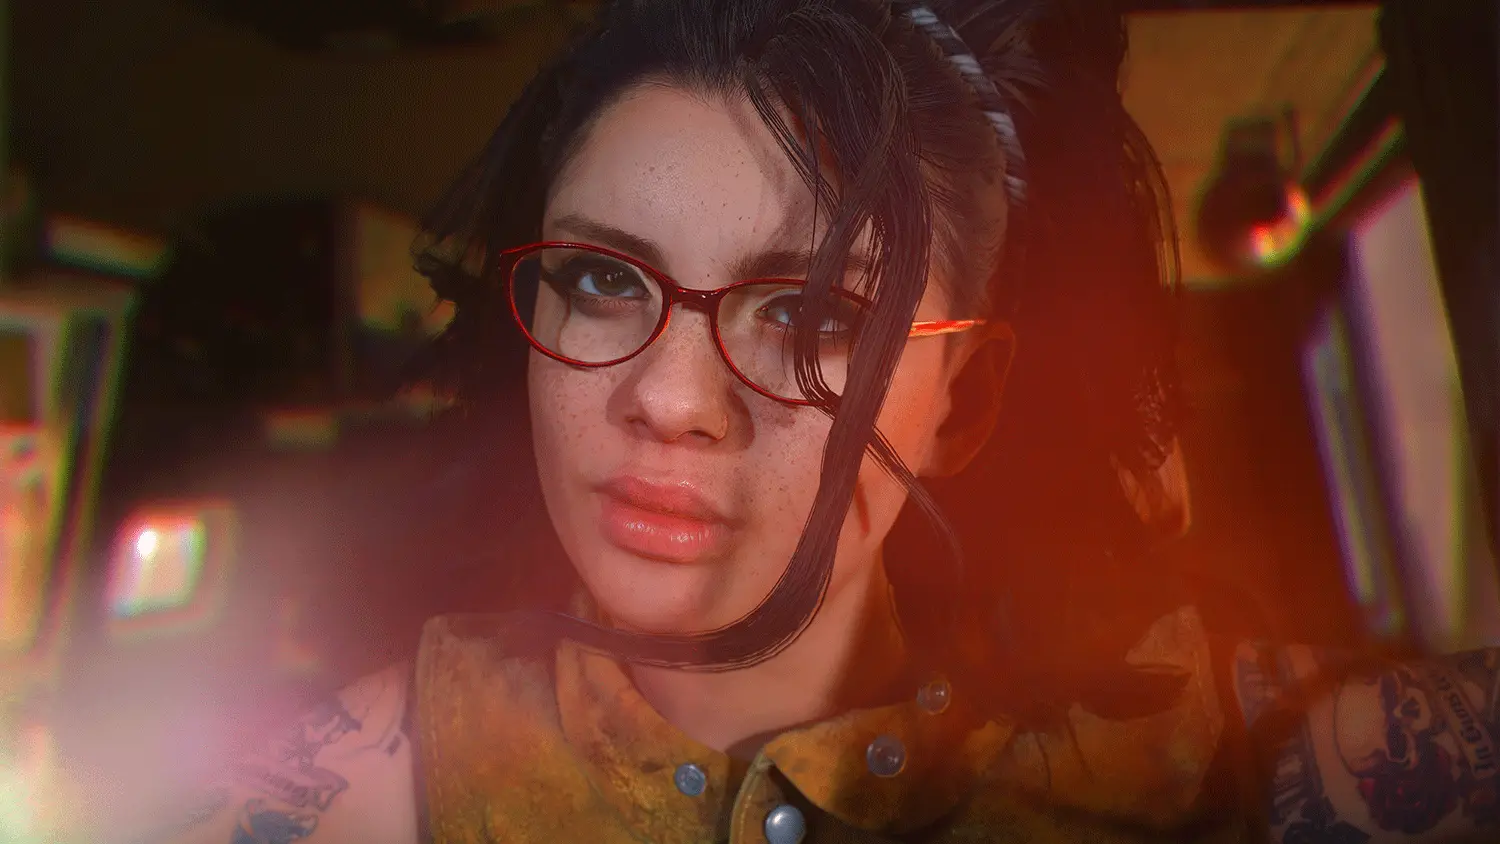
Adaptive fog is also very good for artistic portraits such as this one:
It can be customized with different colors and fog distance.
2. Adaptive Sharpen/ FilmicAnamorphSharpen/ FineSharp/ etc
As the name suggests, the sharpen filters aim to add more detail to the image making it crispier. Some of these shaders are stronger than others and too much strength could ruin the final looks creating jagged edges, so be careful with it when you turn it on.
3. Ambient Light
This filter reacts to the game environment and its lighting, adding in a lens dirt texture, glow and colorful flare.
4. Bloom
It adds some blur to the scene, by default a lot of video games have a bloom effect turned on, so I usually keep it off unless I specifically need it.
5. Border
This shader is useful if you want to create a cinematic shot with black bars like a movie.
6. Chroma Key
If you want to shoot the characters and edit them in postwork with different backgrounds or just to create a transparent png image, the Chroma Key shader will fake a green screen behind the subject(s). The color, however, can be set to any tone of preference.
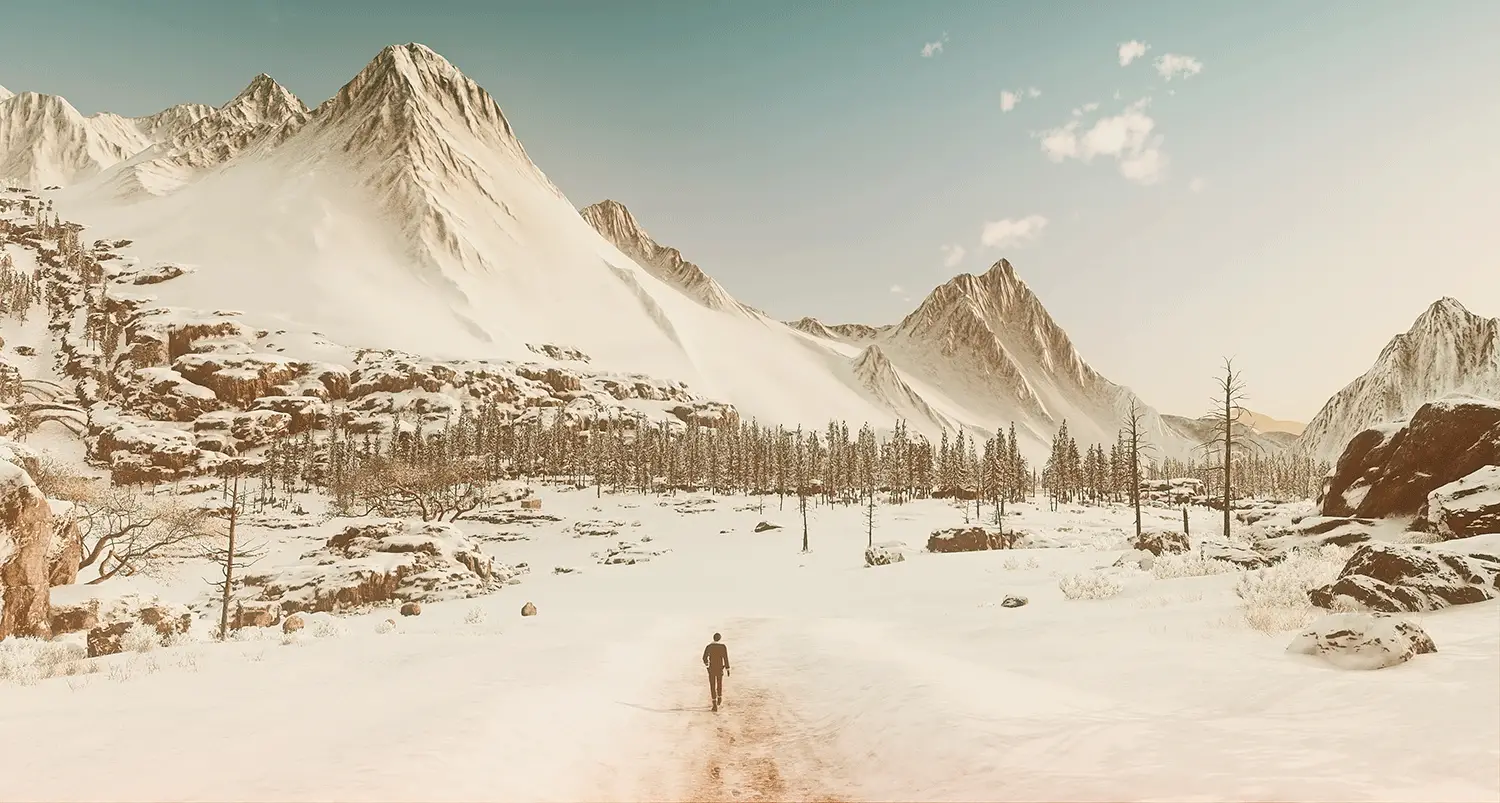
7. Cinematic Depth of Field
This is one of the most commonly used shaders. It generates a high quality depth of field that you can control manually with your mouse. If you place the cursor over the subject you want in focus, the filter will blur everything else according to the camera distance.
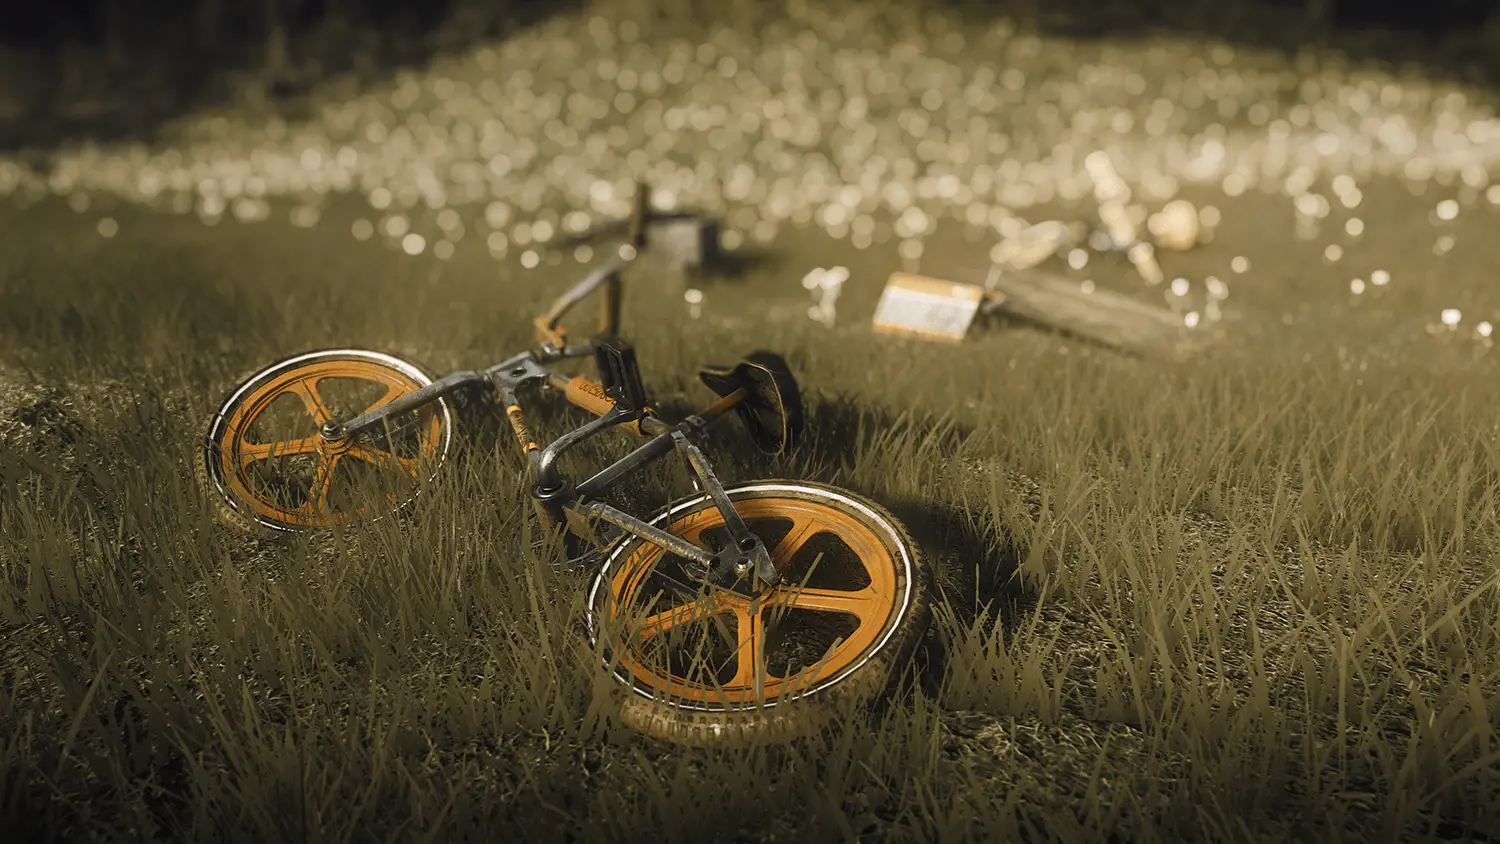
You can find other DOF filters into the list, I like switching between them to have different bokehs and blur results.
8. Levels/Curves
These filters will allow you to control the brightness and contrast of the scene.
9. Deband
This filter is optional, but incredibly useful if you see color banding in the sky or in the background and want to get rid of it. It may not always hide it completely, but it will help you generate a more detailed appearance. Color banding is unfortunately a very known issue that many artists and photographers have to deal with on a daily basis with their works as well.
10. Denoise
It clears out noise from the scene.
11. DisplayDepth
This visual effect is particularly unique when combined with fog, generating a z-pass look. The z-depth pass is a rendering technique used to create a black and white map which fakes depth. In most cases 3D artists merge this specific image with the colored version for more detail, though the black and white channel there is inverted.
Note: If all you get with this shader checked is a fully black or white screen, or you see it split in half with blue-ish normal map on the left, try setting it up in the console like this:
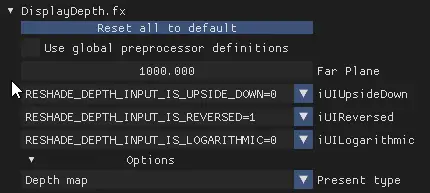
If the game does not have any depth buffer support, this shader will not work as it should and even the cinematic DOF won’t activate at all.
12. Fake HDR
HDR, aka High Dynamic Range, is what modern TVs use to make the image brighter. This shader will basically work the same way.
13. FilmGrain
Should you want to make a filmic shot, this filter will add some dynamic grain to the scene.
14. FilmicPass
This is the perfect shader to create a cinematic look.
15. SMAA and FXAA
These two AA filters may be already present in your standard game settings. However, it is usually recommended to turn the antialiasing off (if possible) and use the ones that come directly with ReShade unless the edges still appear too jaggy.
16. Monochrome
It desaturates the scene completely, looks especially good with FilmGrain.
17. MultiLUT
This filter has a bunch of color presets that look pretty similar to the standard Instagram filters.
18. PPFX_Godrays
If you want to add some powerful sun rays to your scene for an ethereal result, this shader is the one you’re looking for.
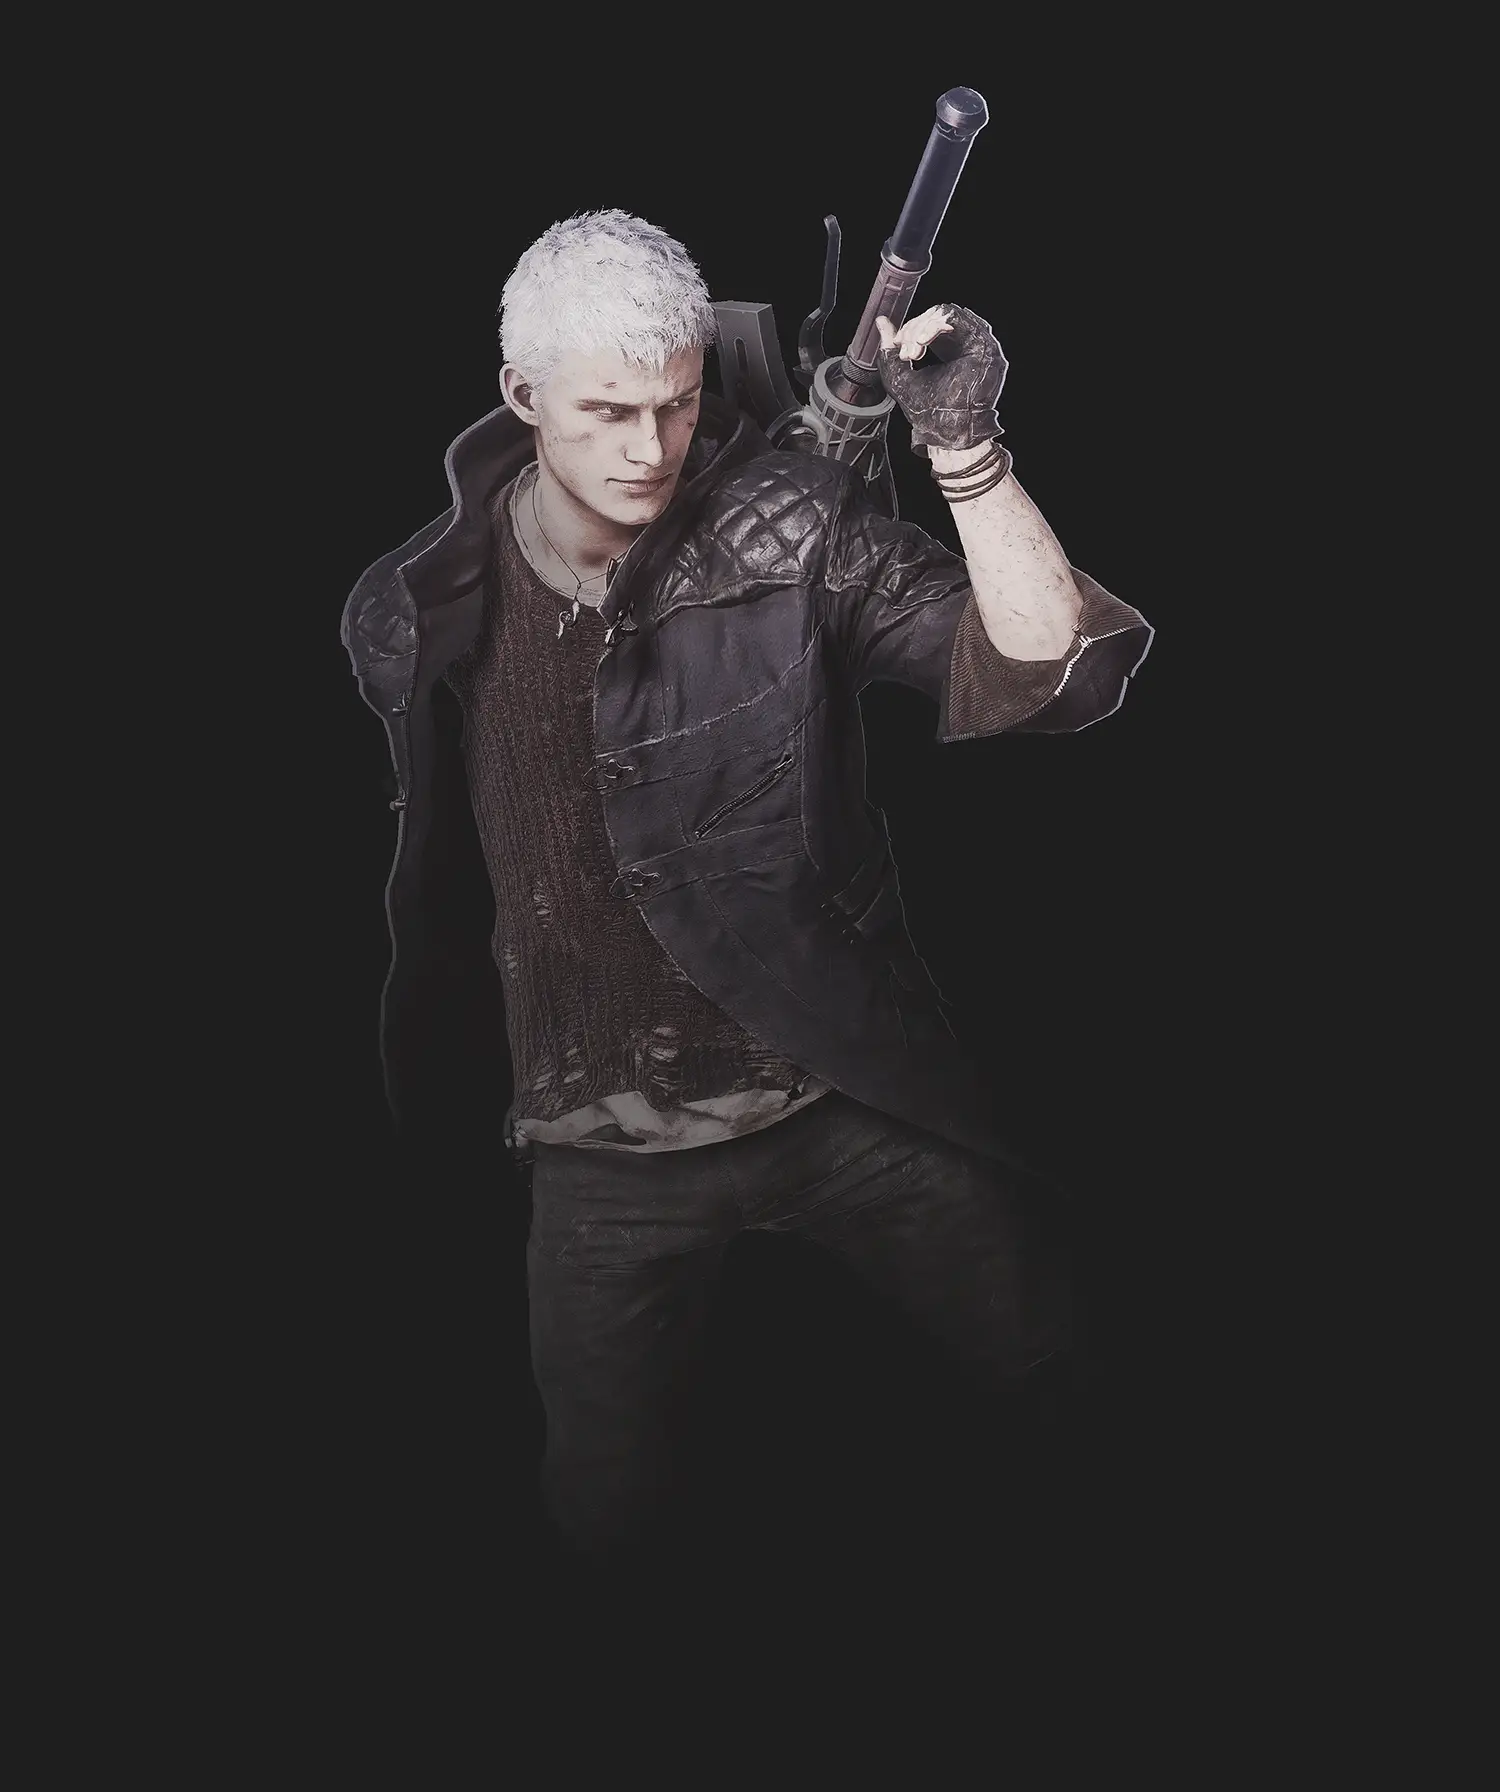
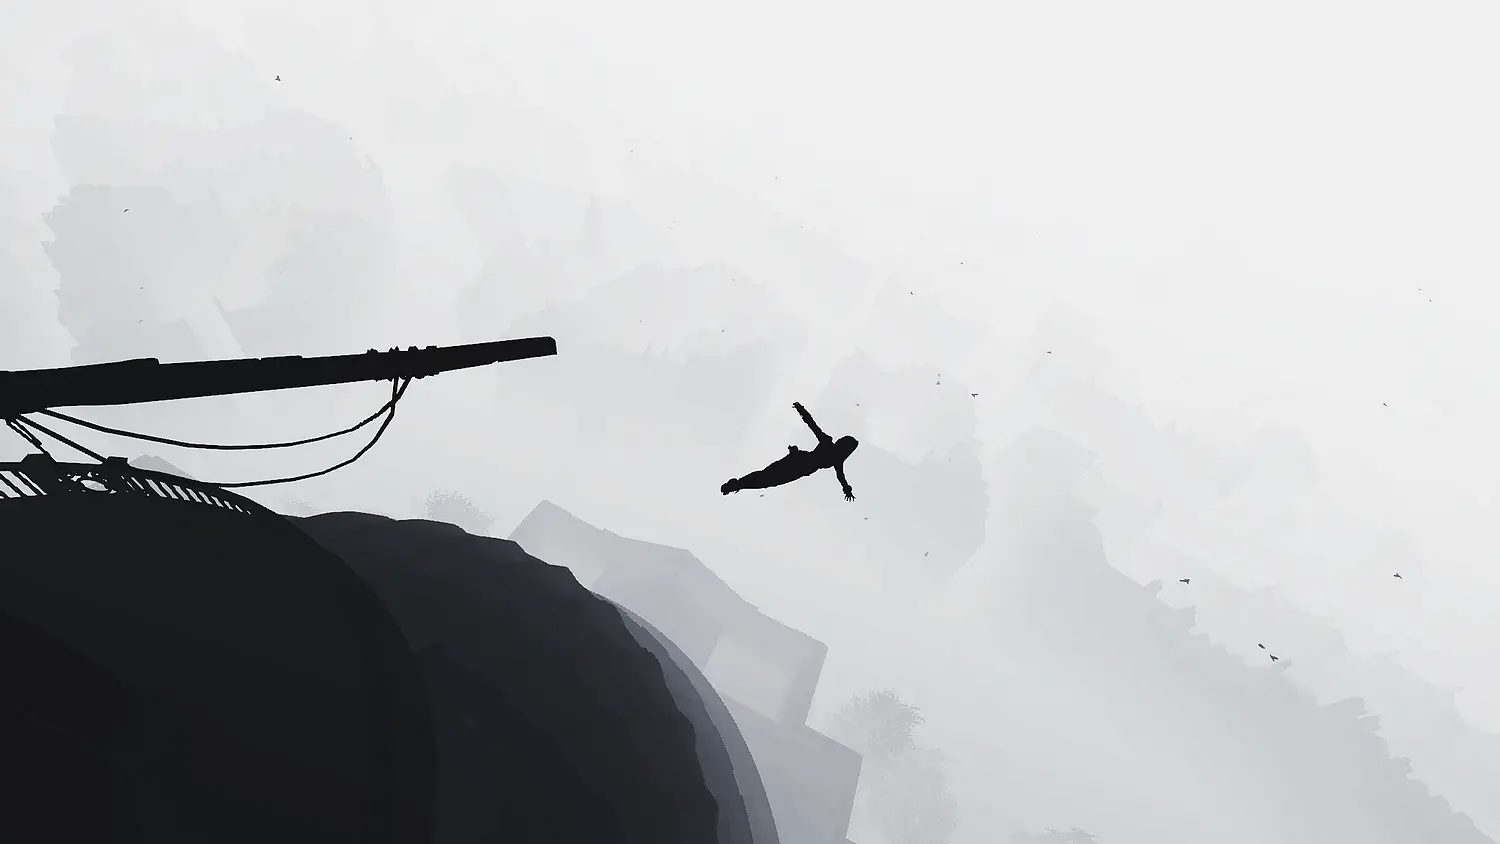
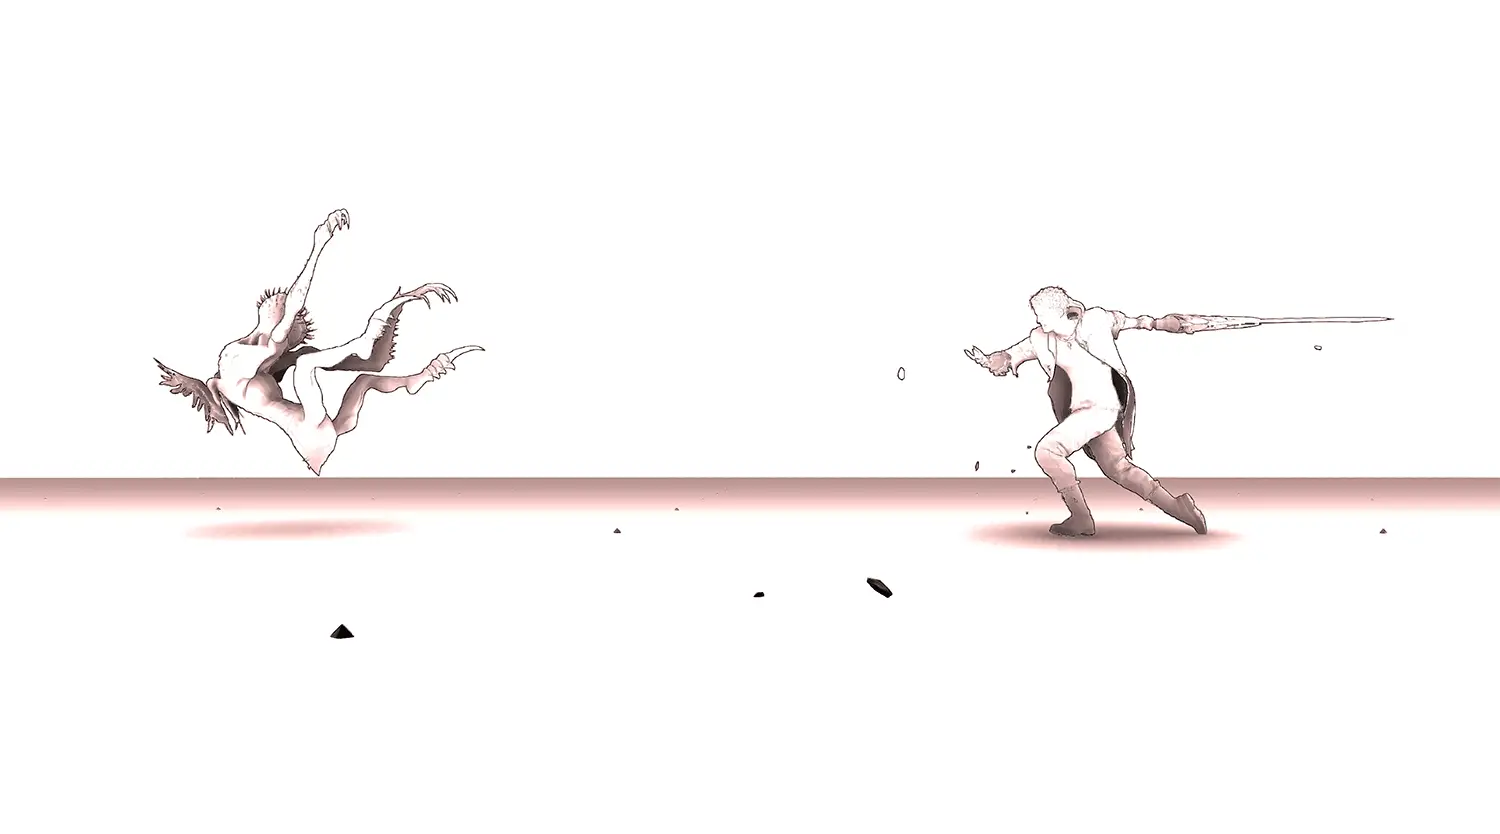
19. Before/After
This is, in my opinion, one of the best additions to ReShade 4. It can store a previously saved frame with specific active filters and add it as a “comparison” next to the current setup. For example:
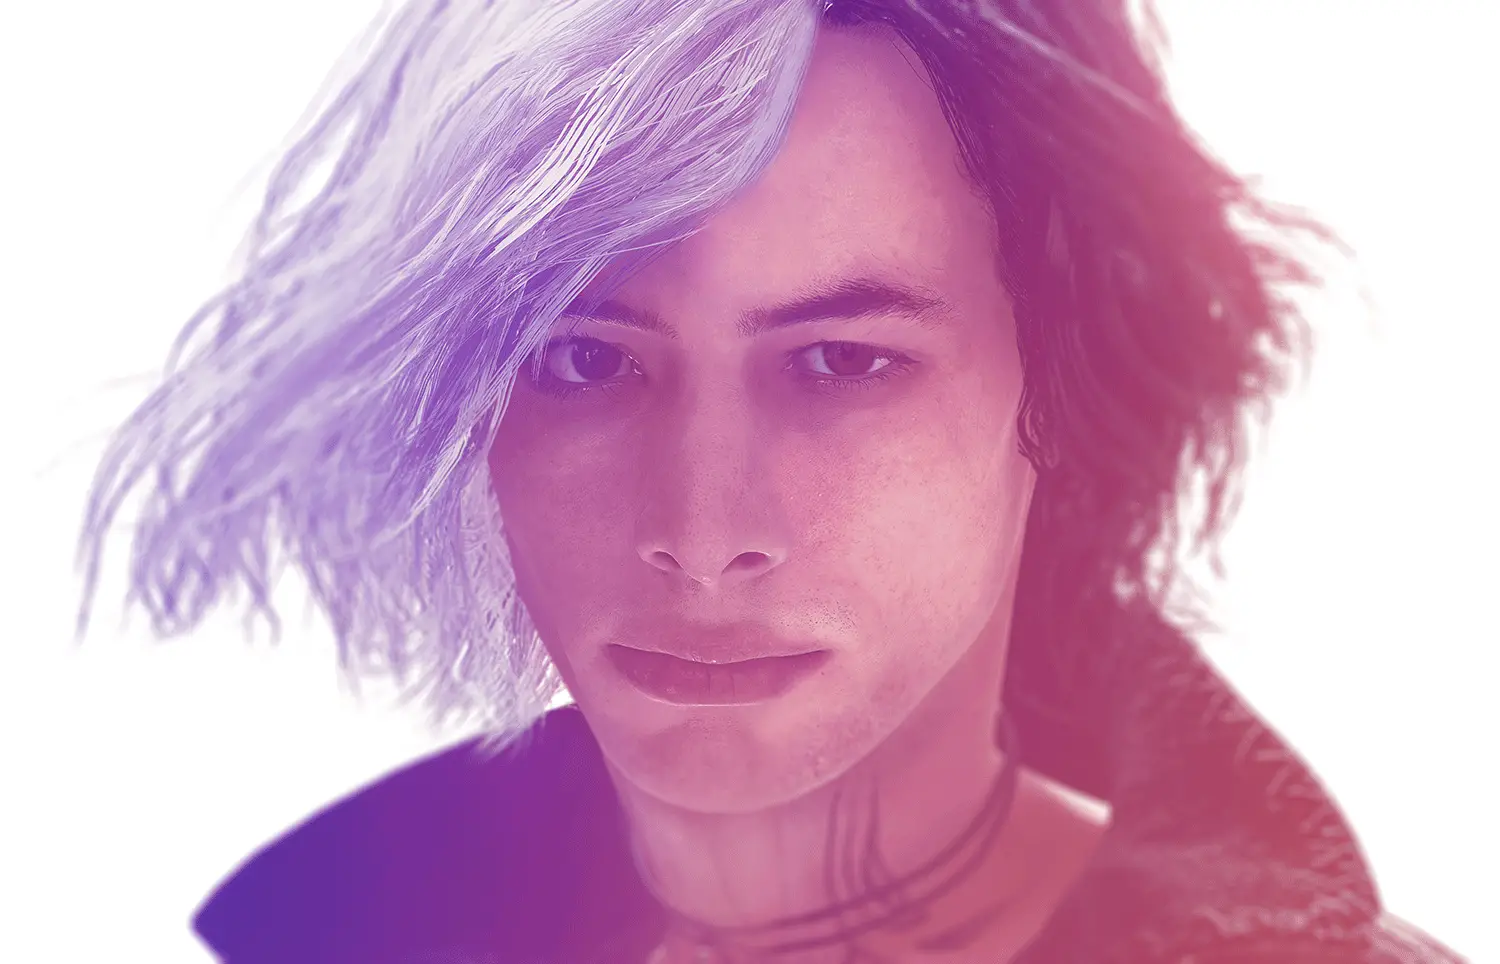
To create this image I stored the Devil Trigger transformation (white hair) with the Before plugin, then selected the After one to save the new information about the character with DT off and hair reverted to normal (black). In order to make it look smooth and seamless I edited it a bit in Photoshop to perfectly match the two faces, other than that it is all created entirely with ReShade.
You can see more about these filters here.
20. Comic (Download here)
The custom made Comic filter is another artistic creation and it can be combined with other filters for different styles.
Note: In certain games it could be a bit problematic to use if you want to simply add black edges around shapes while keeping the rest untouched (e.g. they may not fit perfectly and appear a bit off on some subjects). If the title has Ansel support though, it will probably regulate itself and stabilize this and other effects that do not trace properly out of it. (Final Fantasy XV works that way).
21. Light Leaks (Download here)
A simple overlay custom filter that offers different presets for gradient-like lights.
22. Sunset (Download here)
A nice gradient alternative with vivid colors and different overlay positions/directions.

Custom shaders have to be placed into reshade_shaders (game directory) > shaders.
Performance
Being a graphic mod, ReShade can have a visible impact on your gaming performance if the machine you’re using is not powerful enough to handle everything at once. Some filters can only be activated specifically for screenshots (like DOF), but should you want to record videos or play with them active all the time for better visuals, you have to be sure it will not reduce your FPS count drastically. The more filters you turn on, the harder your GPU will work to push all those graphics to their finest quality. Most filters technically make no difference, while others require a good amount of VRAM in order to run properly.
However, not long ago Nvidia Ansel introduced an official support for custom ReShade filters, which means you could even avoid an installation and keep a vanilla game for gameplay when the photomode is supported.
Games used to showcase the ReShade filters:
• Devil May Cry V
• Everybody’s Gone to the Rapture
• FlowScape
• Lost Ember
• Final Fantasy XV


amzn_assoc_placement = “adunit0”;
amzn_assoc_search_bar = “false”;
amzn_assoc_tracking_id = “pcgamexp-20”;
amzn_assoc_ad_mode = “manual”;
amzn_assoc_ad_type = “smart”;
amzn_assoc_marketplace = “amazon”;
amzn_assoc_region = “US”;
amzn_assoc_title = “My Amazon Picks”;
amzn_assoc_linkid = “c888fae6f478df53ebdc0f0e06f3ac47”;
amzn_assoc_asins = “B07MC23VS4,B07VFKM4VQ,B07L8YGDL5,B06XY25VTC”;