Nvidia Ansel: First impressions
Nvidia Ansel is now available with the latest driver update, thus I want to write down my first impressions about its features and available effects.
If you own a Playstation 4 you certainly know about the Photomode plugin implemented in some installments (Infamous Second Son, Mad Max, The Last Of Us Remastered, etc). On PC, as mentioned a few times in my previous articles, we can only get unofficial tools to play around with camera, field of view and additional visual effects, in order to get professional screenshots similar to the ones released by video game companies to promote their new product.
What is Nvidia Ansel?
Ansel is a new way to capture in-game shots and 360 panoramas. Considering how popular this hobby has become recently, Nvidia created this new plugin to bypass the original limits and create unique screenshots without using any additional program. It is also possible to create immersive views for a VR (Virtual Reality) headset or mobile phone.
It is available for these games at the moment, but they were planning to implement it also in The Division, The Witness, The Law Breakers, Paragon, Unreal Tornament and probably other games which will support the feature.
How does it work?
First of all you have to be sure your graphics card will work with it, because not all the Nvidia models can handle it. You can find a list of supported GPUs on the Nvidia site here.
Open GeForce Experience and check for any update if you haven’t already installed the latest driver (it should be the 368.81). Once you’re done you can load Mirror’s Edge Catalyst (with the latest patch installed) and wait until you find yourself in any open area.
If everything is working correctly, pressing Alt + F2 you should get the Ansel menu on the left side of your screen and the whole game will pause.
This is how it looks:
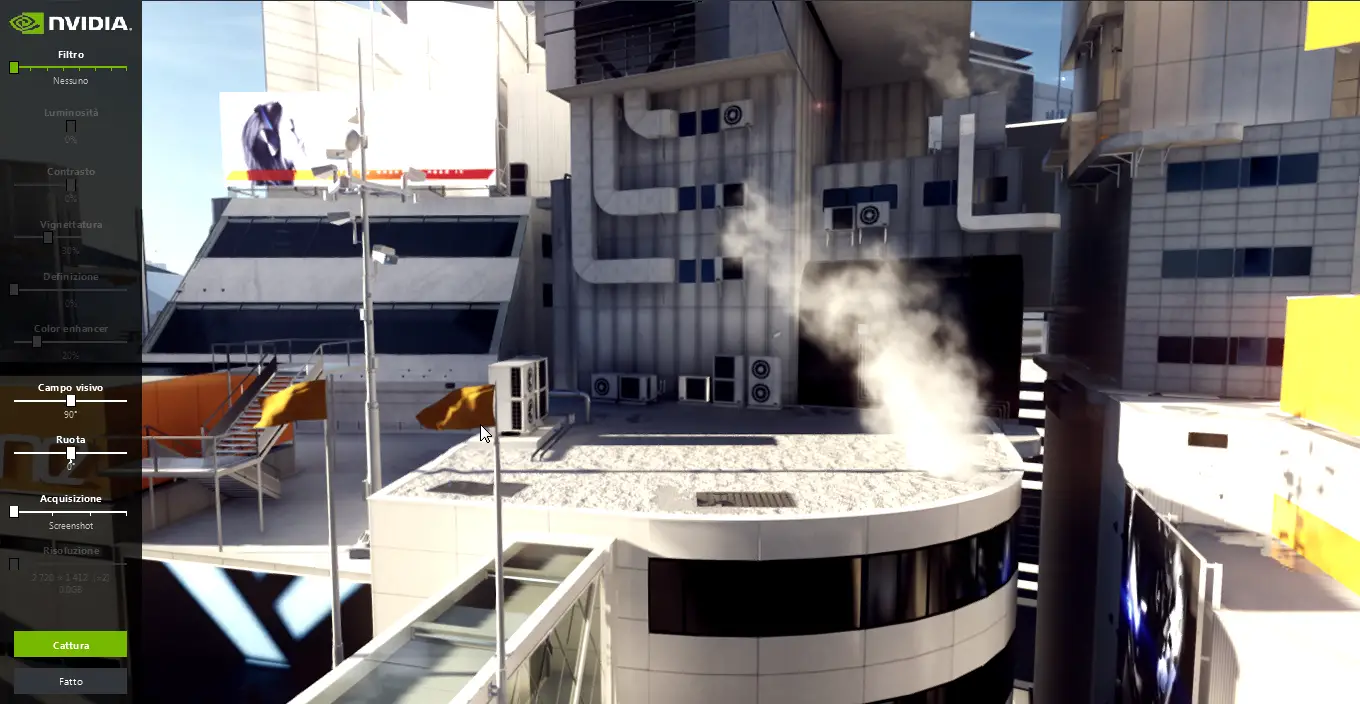
Now that your scene is frozen and Ansel activated you can start moving the camera around. To do so you can use the W,A,D,S,U,J keys and the left button of your mouse to rotate it.
The Rotate option in the left menu tilts the whole scene.
Now that you have placed your camera you can use the Field of view (set to 90° by default) to fix the image if it looks weird or stretched.
Now that you got a perspective you like you can add an additional filter to create a new atmosphere. Move the Filter slider on the top and choose between Custom, Black & White, Halftone, Retro, Sepia, Sketch and Warm.
If you pick the Custom option you can alter the effects manually editing the brighness, the contrast, the vignette and the colors.
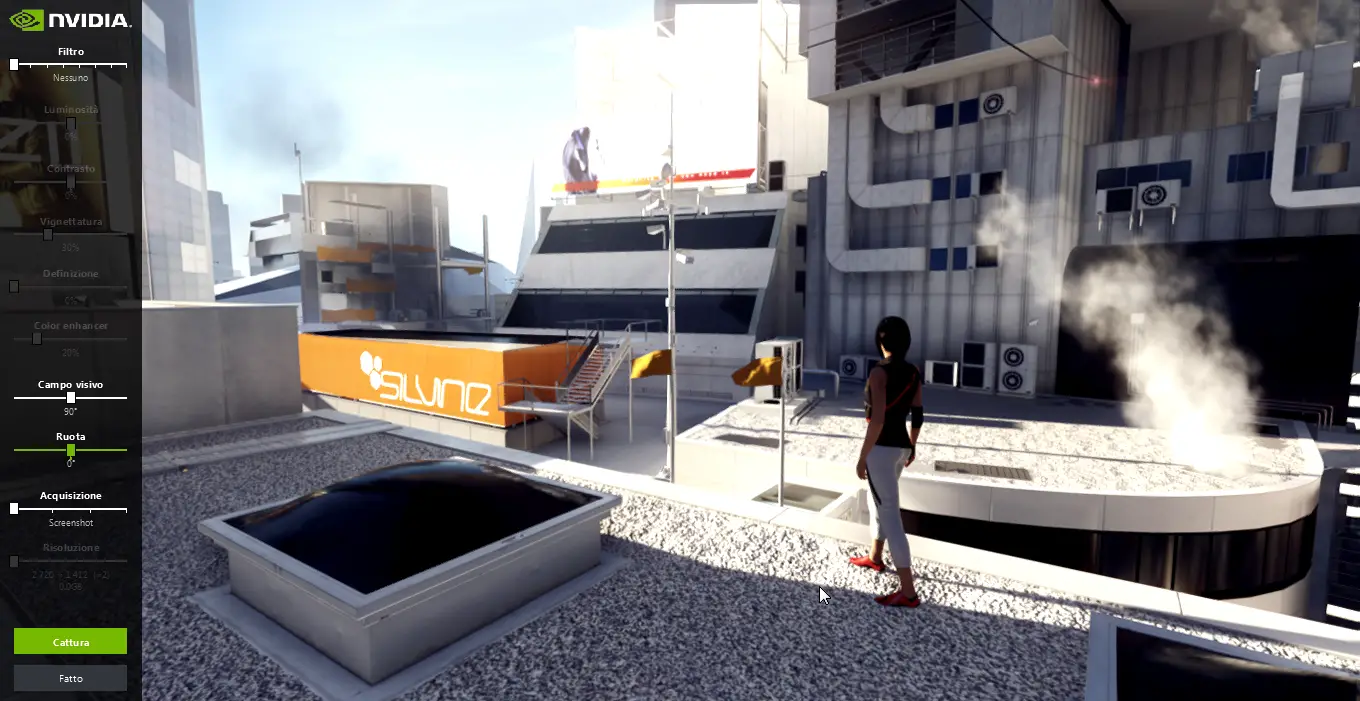
I personally like how the Warm filter looks, so I chose that one:
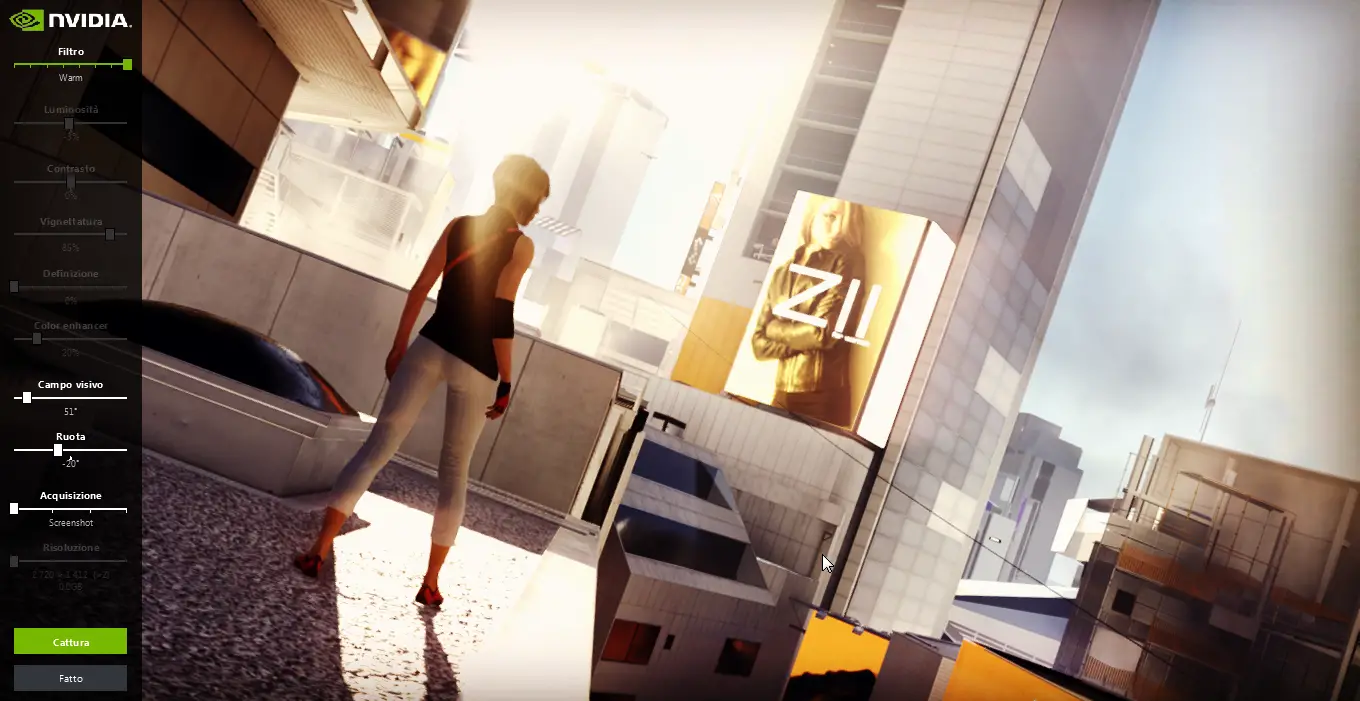
Now you are ready to save your image. With the Capture Type option you can decide how to store your screenshot according to the different formats available. With the Snap button you can save a simple picture in .png format, Ansel should place it in the C:\Users\user\Videos\Mirror’s Edge Catalyst path.
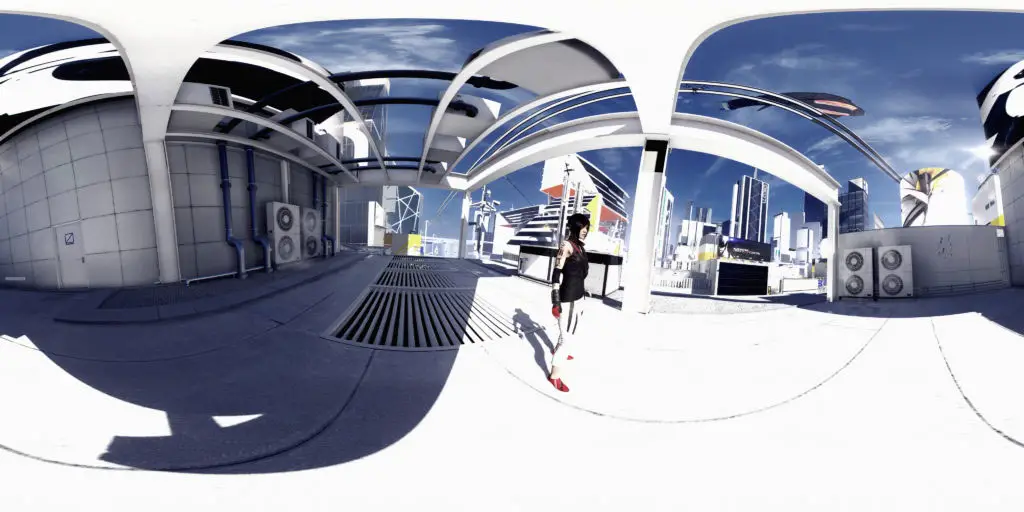
360 will capture a full view panorama in 4k or higher, Stereoscopic will generate a .jps file (generally used for a 3D effect creating two identical images for each eye).
When you’re happy about the obtained result and your image/panorama is saved you can close the Ansel plugin clicking on Done to play normally again.
If you want to know how to view your panorama with a VR headset check the official page here.
If you want to upload the 360 shot on Facebook you can simply load your image like any other photo, it will immediatly recognize it as a VR file and all your friends will be able to rotate it to virtually enjoy the whole environment.
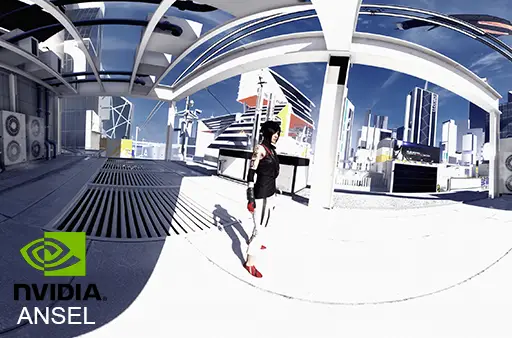
Example of 360 image:
Positive considerations:
I really like the filters, especially the Retro and Warm ones. The camera is very easy to control and the FOV allows you to create different perspectives with a simple slider, they basically work just like the Cinematic Tools created by HattiWatti.
The 360 images are a very nice touch in my opinion and you don’t even need to rotate the camera yourself to capture each frame and stitch everything together with an editing program. Ansel will do everything automatically, so you can sit and have a snack while it works on the full capture (it’s quite fast, don’t worry!).
Negative considerations:
I recently watched the Nvidia Ansel conference and they showed an interesting feature that for some reason is not included in this release for MEC: the High Resolution option for screenshots. One of the most important things for in-game photography is the possibility of creating high quality images for more defined pixels and details, thing that you can do only using external programs to manually alter your native resolution.
Ansel looked appealing to me because, just like GeDoSaTo, it was supposed to generate 4k and even 8k images without changing the window size at all. Bug or forgetfulness I truly hope they will add it to the plugin, especially considering my original resolution is not particularly high.
It’s still possible to get very big 360 panoramic pictures though.
Another thing that I consider essential in screenshots is the Depth of Field filter and this is sadly not included in Ansel either. I feel like they could add a lot more in this revolutionary photo mode for PC games, but considering we still are on the initial versions I expect new improvements soon enough, so let’s wait and see.


